
Using Google Meet (desktop / laptop)

This guide will help you to use Google Meet for live events such as the Crochet Classroom and Crochet Clubs when accessing via a desktop or laptop computer.
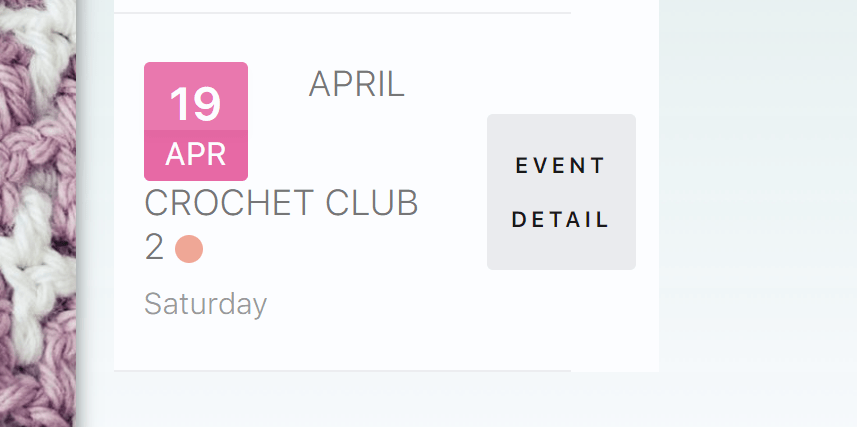
You’ll need to click the link to join the Meeting which can be found on the events calendar section on the dashboard. Click the Event Detail button to find the Google Meet link. Meeting links are also published in the general crochet group chat, the facebook group, a push notification to devices using the app and via email.
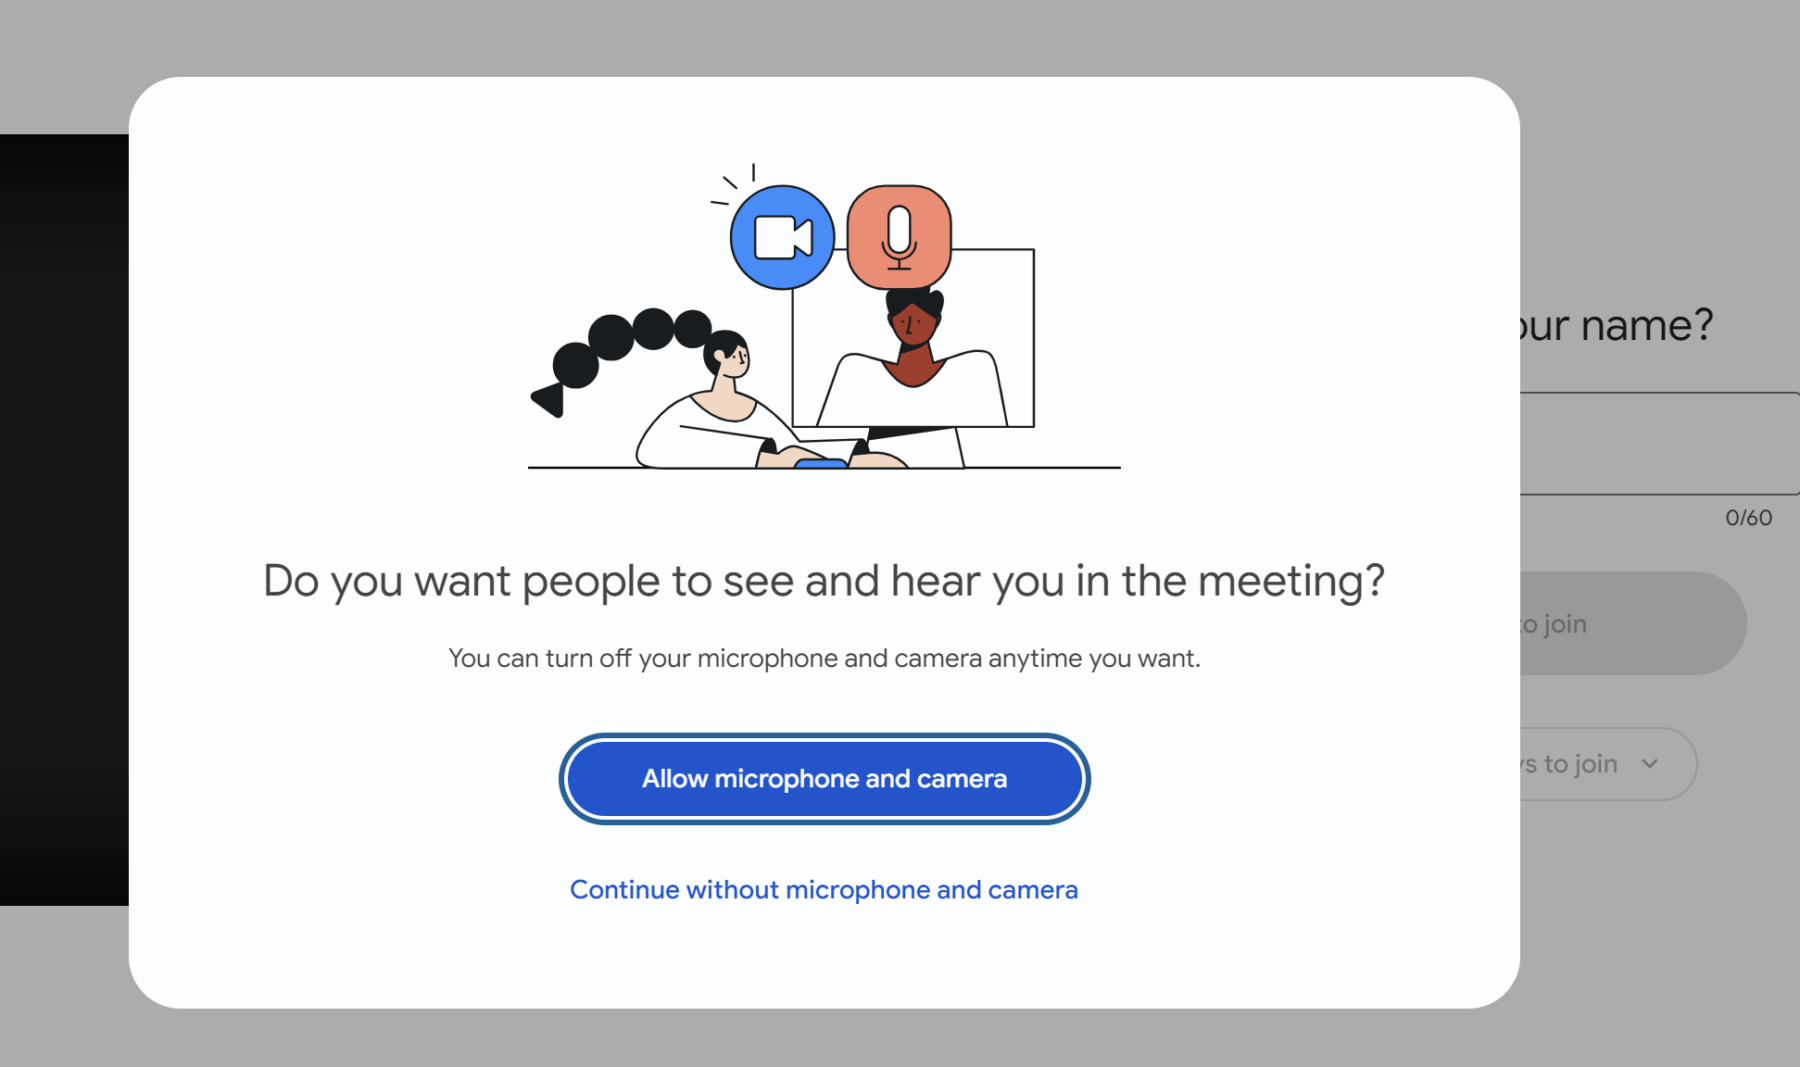
Once you click on the link for the Google Meeting you will be taken to the meeting page where you may be prompted to login to your google account or continue as a guest. Either option is fine. You will be given the choice to activate you camera and microphone and you may need to grant permissions from a pop-up that will appear to allow your browser to use them. This is optional, you don’t have to have your camera or microphone on for any of our interactive live sessions.
Once you’ve entered your name, click Ask to Join and wait for one of the team to let you in.
Below is a photo of the main window. There will be a number of squares visible with different member’s video streams along with the host. There is a row of tools at the bottom which we will explain in the next section.
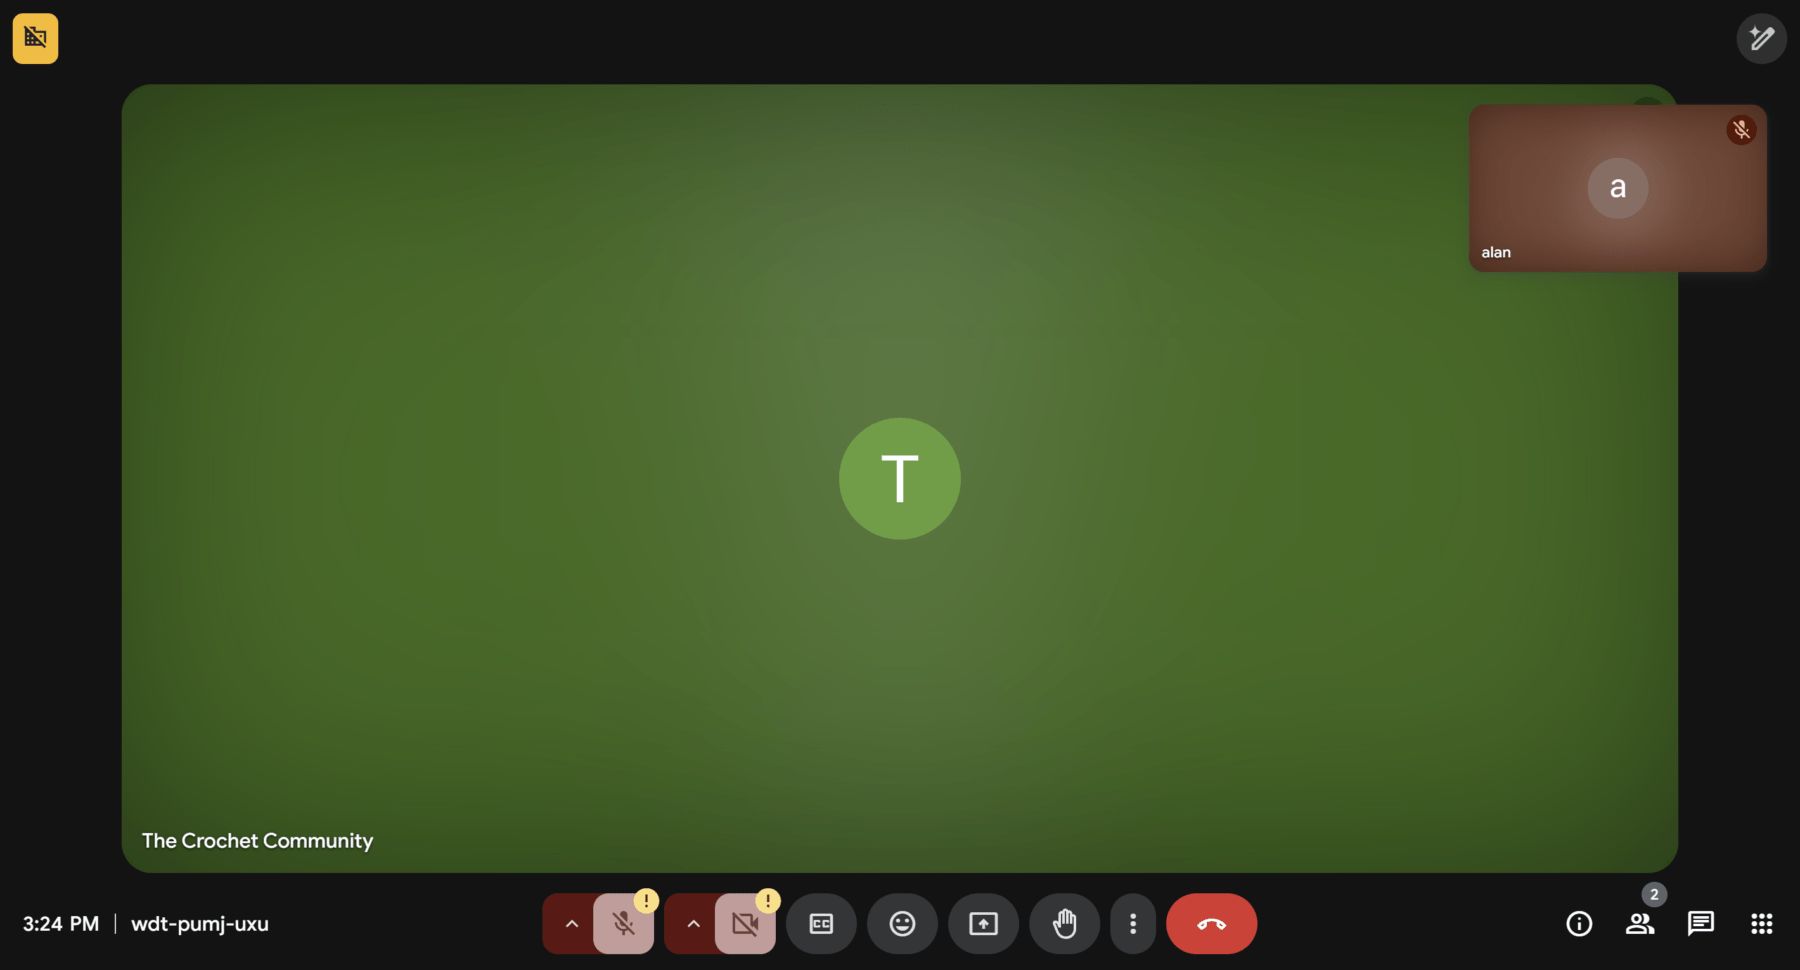
From left to right (important functions are in bold) we have the current time and the meeting join code.
Then in the centre block we have microphone controls, camera controls, auto-generated captions (subtitles), emoji reactions, share your screen, raise your hand, more options (three vertical dots), and exit meeting.
Finally, on the right-hand side we have meeting details, people, text-chat and meeting tools.
Let’s discuss what the buttons do and when to use them.
- Microphone controls – the host may choose to mute all microphones to enable a focused teaching segment. If invited to, you can click this to unmute yourself so you can speak during the meeting to ask a question or offer some information. You can mute yourself at any time
- Camera controls – this button allows you to turn your camera off or on during the meeting.
** No-one else (including the host) can unmute you or turn your camera on during a Google Meet. This means that you have full control over your privacy. **
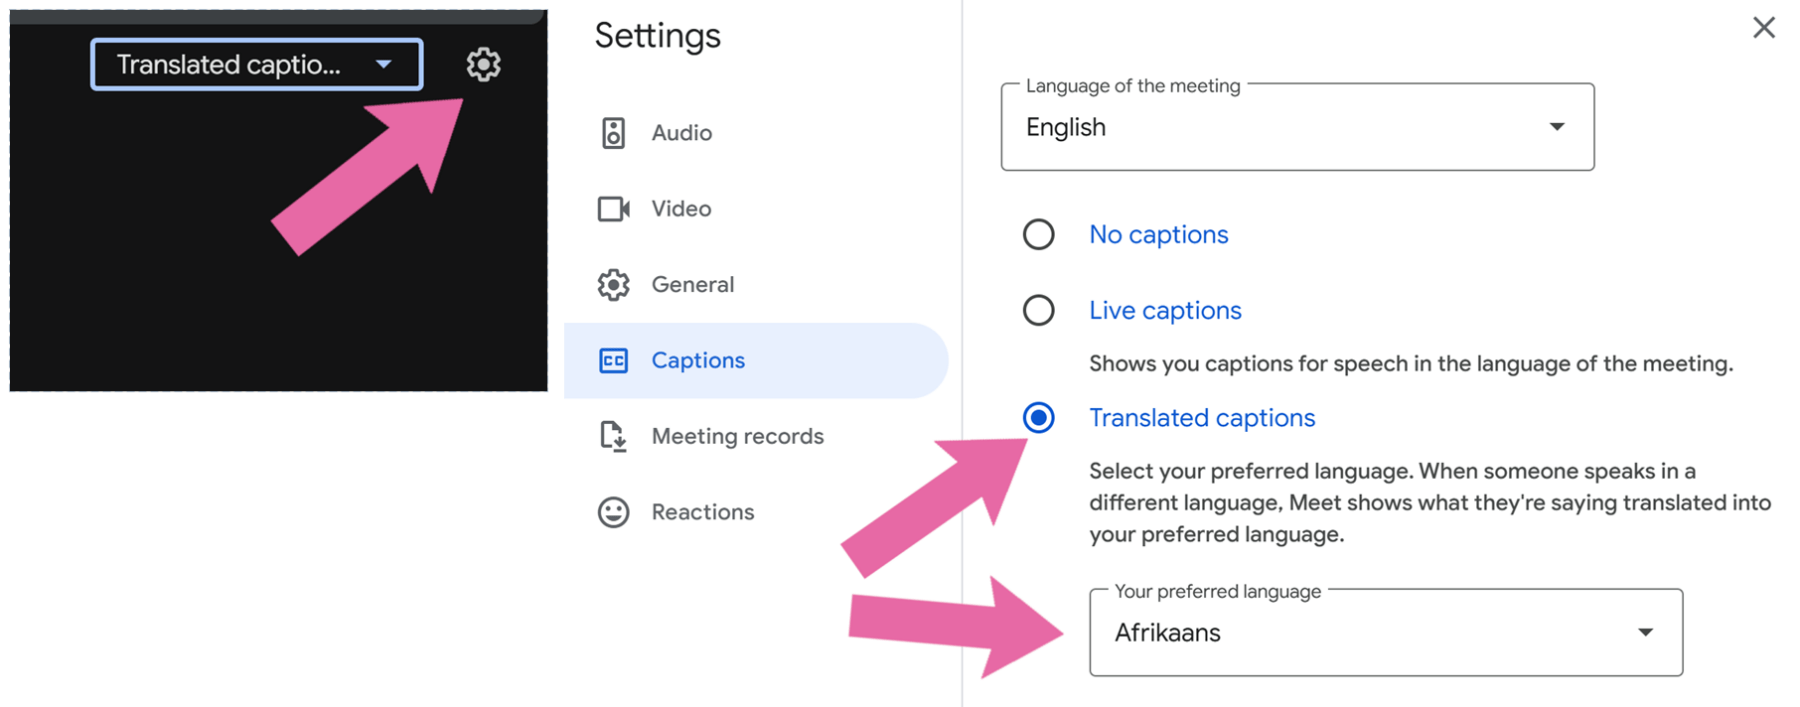
- Auto-generated captions [CC] – This is an accessibility feature for displaying live subtitles on the screen of what is being said. There is also an auto-translation feature for the subtitles to be displayed in different languages (see picture below).
Emoji reactions – This allows you to send an animated cartoon emoji to react to something you’ve seen or heard. Once you click the button and new row appears above with different emojis you can use (see photo below).

- Raise your hand – This button alerts the host that you would like to speak. If invited to, please unmute yourself and ask your question or offer your thought to the group. You may need to click the icon again to un-raise your hand, and don’t forget to mute yourself afterwards if it is a teaching session.
- More options (three vertical dots) – This button brings up a menu with several options:
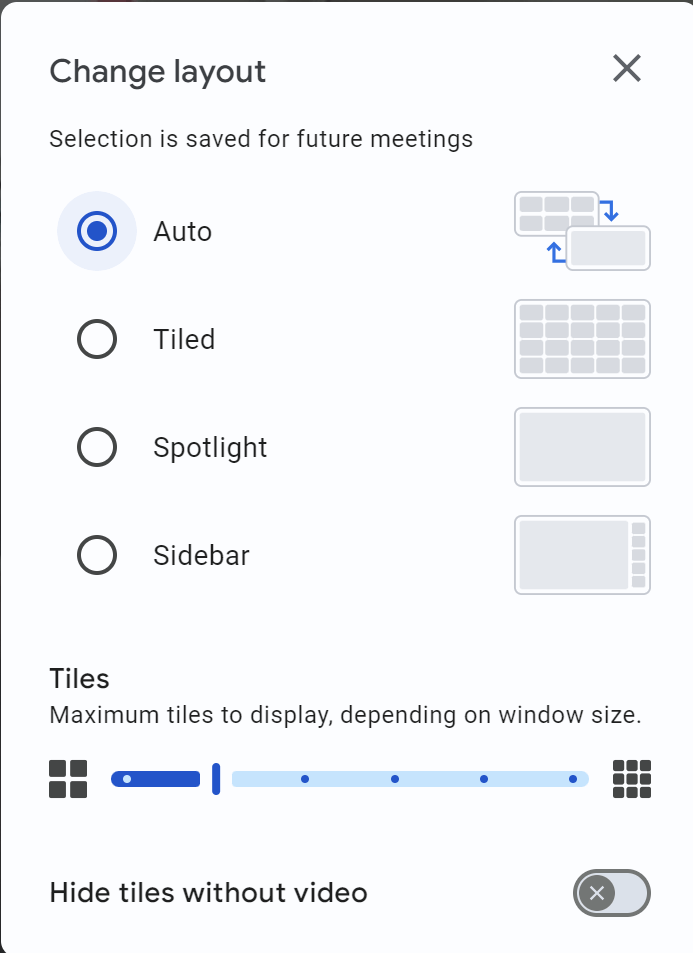
- Change layout – Gives you different viewing options when displaying the video tiles.
- Full screen mode – enlarges the screen so you can see more of what is going on.
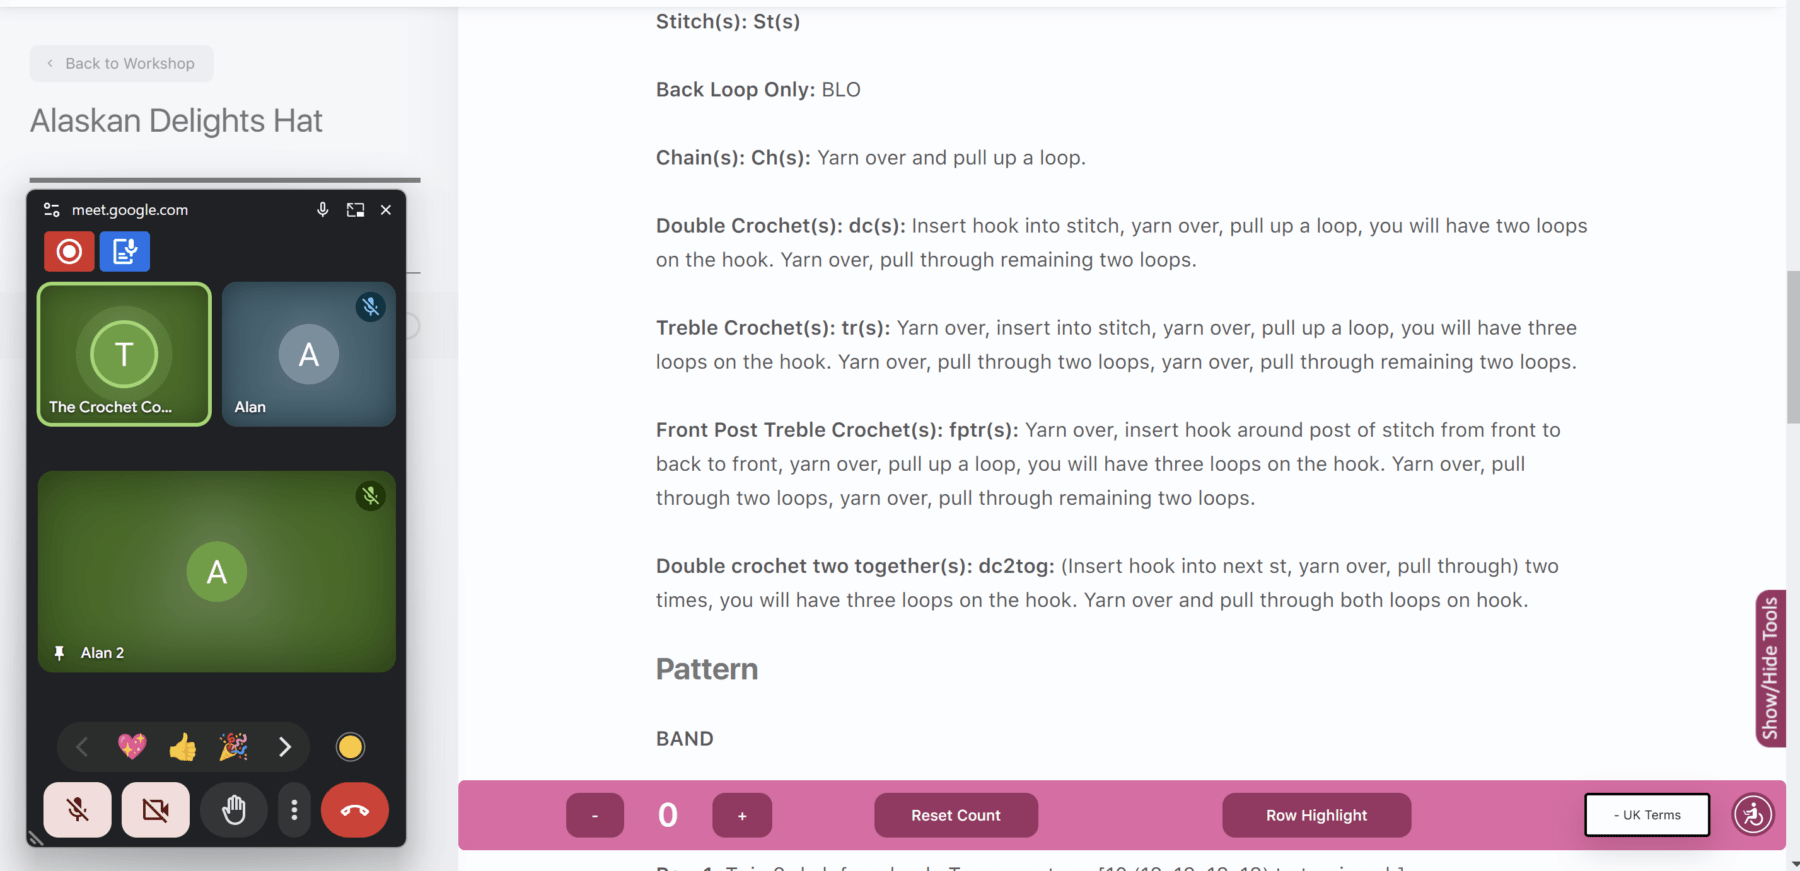
- Open picture-in-picture mode – this feature is very useful as it creates a small floating window of the meeting. You could view a pattern while still having the meeting on your screen (see the photo below for an example). To return to the full view mode, click the button to the left of the x in the floating meet window.
Exit meeting – Allows you to disconnect from the meeting.
Moving to the set of buttons on the bottom-right of the screen we have:
- Meeting details – This button is not likely to be needed for our sessions.
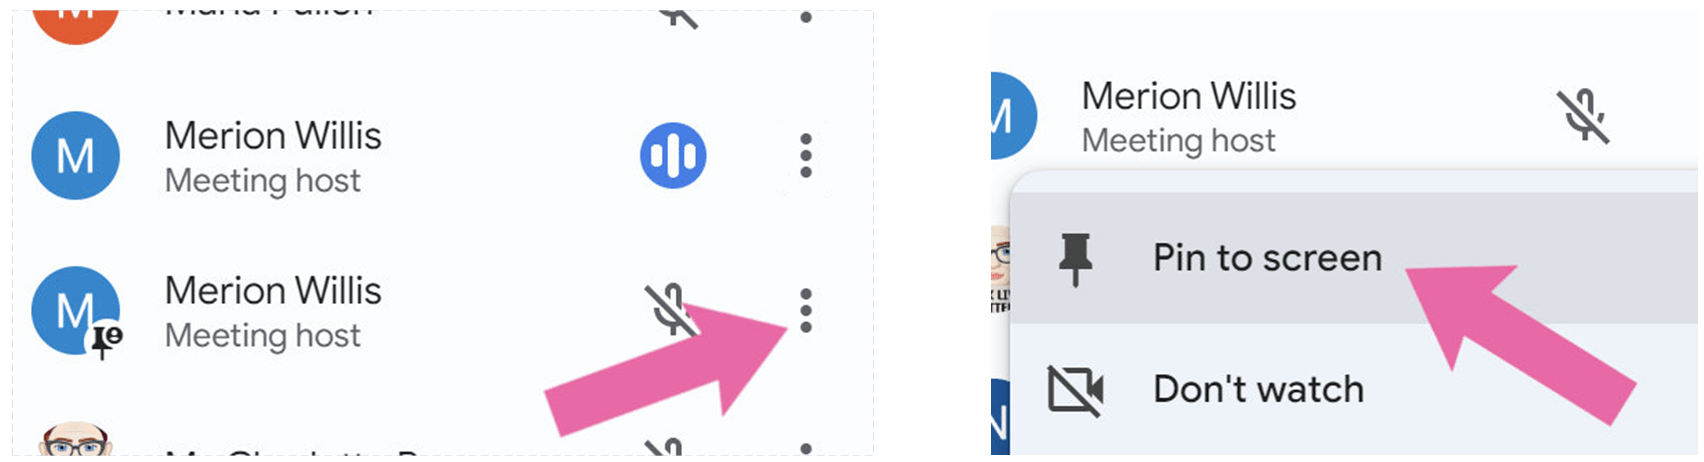
- People – Brings up a list of all members who are connected to the meeting. Here you can pin video tiles which is useful if you are unable to see the host or the host’s “hands-camera”. To do this, open the people menu, scroll to the host on the list. On each of the host entries click the three vertical dots and then select “Pin to screen”.
- Text chat – this allows you to type messages for the group to see. You can keep this open during the meeting if you wish to engage without speaking. Helpful for asking questions without interrupting the host.
- Meeting tools – this is the final button and it brings up a list of a few features that may be used in the sessions. The polls feature is an example that may be used here. The host should inform you if there is an active item and invite you to take part (if you wish).
That’s the fundamentals covered. Hopefully you found this useful but if anything needs further clarification, please ask in the group chats and we’ll gladly help.